Khao Tom Mud (Sticky Rice with Banana)
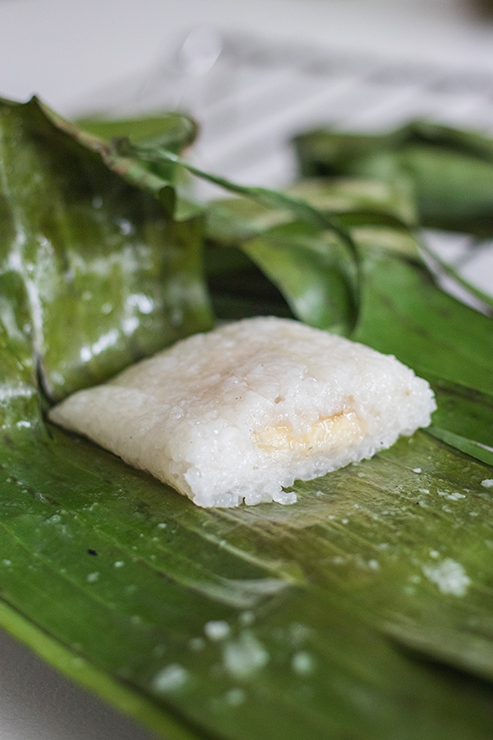
Khao tom mud is a dessert or a sweet snack made from sticky rice, coconut milk and banana or other filling. It is a typical part of Thai cuisine, usually made from locally available ingredients including bananas or taro, and banana leaves.
Although the traditional khao tom mud is steam-cooked after being wrapped in banana leaves, in this article I will also cover other cooking alternatives in case you don’t have banana leaves, or a steamer.

Ingredients for making khao tom mud
To make khao tom mud (bananas wrapped in sticky rice) with the following recipe, you will need:
- glutinous rice (also known as sticky rice)
- full-fat coconut milk
- pandan leaves (optional)
- fresh bananas
- banana leaves (or corn leaves if you prefer and have available fresh)
- agave nectar, coconut blossom sugar or other non-refined sugar.
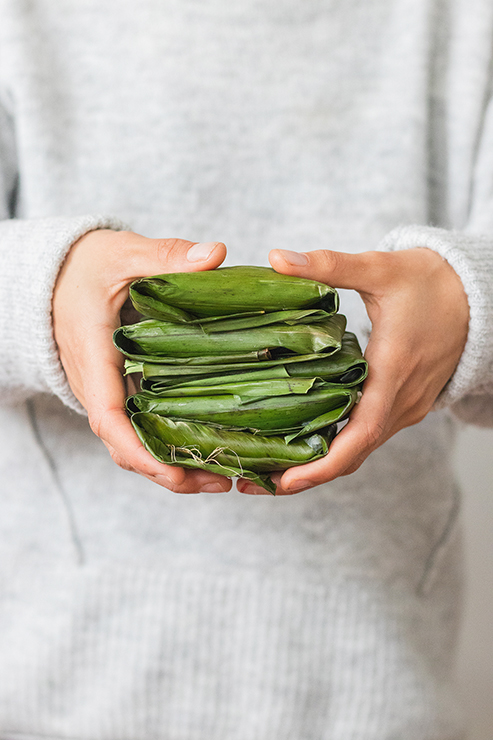
Sticky rice is a must in this recipe, and you cannot get this special, gooey texture with other varieties of rice. This kind of rice is also called “glutinous rice” because of its high starch content that makes it very sticky and gives it the stretchy consistency when cooked.
Coconut milk is the ingredient that will add more flavour to the khao tom mud, and make it creamier because of its fat content. The only coconut milk that I use in my recipes is a natural, full-fat coconut milk without any additives.
So, I will look for a 60-70% coconut content milk, with the rest being water. For this particular recipe, you won’t ruin it with the watery, more artificial coconut milks, but it won’t be as tasty and creamy as with the real coconut milk. The closest to original Thai coconut milk I could find online was this canned coconut milk – it contains some guar gum as a thickener, but otherwise almost perfect – try to get something similar for your khao tom mud.
Fresh pandan leaves are added to the rice for extra flavour. Fresh leaves are the best, but dried pandan leaves can also work. If you cannot get any fresh pandan, it is not such a big deal – your khao tom mud will still turn out tasty without it. You can also add some vanilla or some other spice that you prefer.
In this recipe I prefer to use light agave syrup rather than its healthier alternatives such as coconut blossom sugar or maple syrup. The reason is simply aesthetic – with light agave syrup, khao tom mud will keep its natural colours of white rice and fruits, which will make it look more appealing than with brown, molasses rich sugars.
Light muscovado would probably be my next choice because it is only lightly coloured with molasses.
As for the choice of fruits (since bananas are not that common to grow in Europe), it can be any seasonal fruits that you prefer. I recently made a version with local peaches from the farmers’ market, and it turned out delicious. I would also like to try it with sweet potatoes instead of fruits (in Thailand they sometimes use taro tuber).
Also, the banana leaves are not an absolute must. Yes, the traditional Thai version of khao tom mud is made with banana leaves, but not everyone can get their hands on some. My favourite substitute option are fresh corn leaves!
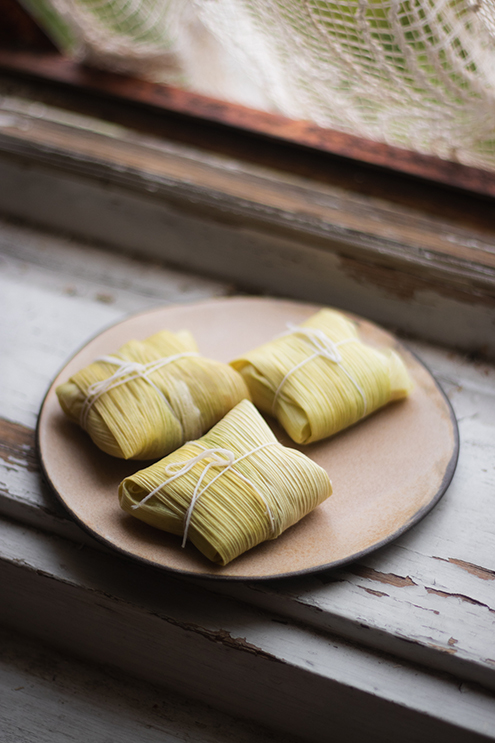
The fresh sweet corn is still in season in Europe, and I love how these protective leaves around corn cobs, that would usually get thrown away or composted, get a whole new use.
Making khao tom mud – two ways
Khao tom mud is made slightly differently in each household, so traditional recipes will always vary a bit. In most cases, the whole thing will be steamed after being wrapped in a banana leaf. But, for start, you will need to cook the sticky rice.
I like to soak the rice in water overnight, or at least for 4 hours, to shorten the cooking time. Then I drain it from the excess water, and cook in slightly sweetened coconut milk with some pandan leaves. After that, I wrap it in banana leaves or corn cob leaves, together with some fruit in the middle, and steam it.

There are two ways in which you can steam-cook your khao tom mud.
1. The traditional way (using a steamer)
Any kind of steamer will work, as long as you have a sufficient surface for laying the wraps one next to another, and a lid to keep the steam inside. I’ve even done this using a wide, flat metal sieve and putting it in a large saucepan, lifted a bit from the boiling water at the bottom of the saucepan.
If you are using a bamboo steamer, fill it up with khao tom mud wraps, close it and put it over a large wok or a pot filled with boiling water over a medium heat. The water level should be low enough to not touch the wraps while it’s boiling.
Then you just need to steam the khao tom mud for 10-15 minutes and they are done!
2. The oven method
Since I didn’t have anything that could be useful for steaming food in our newly rented flat in Norway at the time when I decided to write down this recipe for you, not even to improvise, I decided to steam-bake them (and that thing was a complete improvisation as well).
They turned out really similar to the steamed ones and definitely convincing enough to bring us to a warmer and sunnier place at least for a moment.
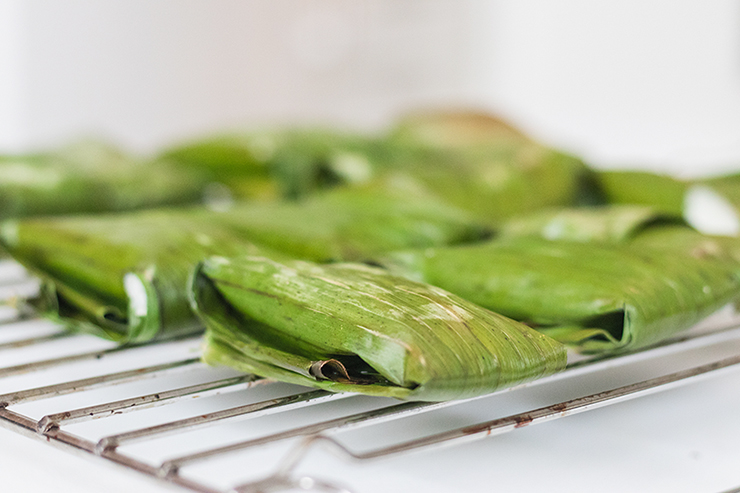
To steam the khao tom mud in the oven, you simply need to heat up the oven with a shallow dish full of water on the bottom. Then you will “bake” the wraps on a metal bar placed over that water.
Storing khao tom mud
You can simply store the khao tom mud at the room temperature for a day, or put the wraps in the fridge if you need to store them for longer. The banana leaves will help them stay fresh and prevent them from losing moisture.
Equipment for making khao tom mud
- Cooking pot for cooking the rice
- Cooking spoon or a spatula
- A steamer of your choice (all of them will work great, it is up to your preference):
- Bamboo steamer
- Simple foldable metal steamer basket – a great budget option that is also great for travelling
- Steaming basket – non-foldable
- Pan with a steamer
- Steaming pot
- Larger, wide pot or a large wok pan for steaming (needed if you don’t have a whole steamer pot).
Khao Tom Mud (Sticky Rice with Banana)

Follow this easy recipe to learn how to make Thai sweet treat khao tom mud (also known as khao tom mad or khao tom mat) - a sticky rice and coconut milk dessert filled with bananas and wrapped in banana leaves.
Ingredients
Instructions
- Soak the sticky rice in water for 4 hours or overnight.
- Strain it and put it in a pot with coconut milk, in which you had previously mixed salt and agave syrup or coconut blossom sugar.
- Cut the pandan leaves vertically into two halves, tie them in knots to keep them together, and put it into the pot.
- Put the lid on and place the pot on the stove over a low heat. Do not open the pot or mix - just be patient and let the rice slowly soak the liquid as it's being cooked. This can take around 20-30 minutes - the time depends on your stove and size of the pot, so just check on it regularly to see if it's cooked.
- When the rice has soaked up all the liquid, remove it from the heat, take it out on a plate and let it cool down a bit (you can take away the pandan leaves somewhere around now).
- Prepare the banana leaves - if you have enough, you can put a double layer: the outside piece of leaf with its shiny side out, and the one that will be inside with its shiny side facing inside.
- Put around two big tablespoons of rice in the middle of the leaf, then place a piece of fresh, sliced banana in the middle, and wrap it all up. You can secure the wraps with a cotton thread (I didn't do it this time so they didn't turn out that tidy - still delicious though!).
- If you have a steamer, fill the bottom with water and bring it to a boil; then put the wraps on the steamer bars, cover and steam for 10-15 minutes.
- If you don't have a steamer, you can do the oven method: preheat the oven to 175 °C and put an oven-safe dish full of water on its bottom (I used a bread mould for that purpose). Put the banana wraps on the metal bars and bake for 10-15 minutes. Alternatively, if you have a smaller metal rack, put it directly over a dish or tray filled with water (so the water is under the rack, not touching it). That way, the water will be closer and the steaming more efficient.
- They will taste the best if you let them cool down completely, so I like to let them cool for at least an hour before serving. I find them even tastier if they have been in the fridge overnight because they get even more of the banana leaf flavour.
Notes
* I use coconut milk that has a 60-70% coconut content, and the rest of it is water. So, the simpler the better. It won't be the same with those more artificial, watery coconut milk (although it won't completely ruin the result), so try to find a good, natural full-fat one.
* Light agave syrup is my favourite choice in this recipe because other, more wholesome sweeteners will colour it brown because of their higher molasses content. If you don't mind the brown colour, you can use coconut sugar or maple syrup instead.
* Instead of sliced bananas, you can use some other seasonal fruits.
* The oven method works fine (as you can see in my pictures), but I do hope you have a steamer for the best result.
* Traditionally, khao tom mud wraps are steamed in pairs: first, individual portions of rice and banana are each wrapped in separate banana leaves. Then, these are combined side-by-side and securely tied together with string or twine, forming pairs. Finally, these pairs are steamed until cooked through.
Bits of travelogue or applied botany
Many cultures that use banana leaves in food preparation have some kind of a rice or other grain based dessert wrapped in a banana leaf. These types of sweets is not typical only for Thailand, but for a big part of Southeast Asia, as well as a part of Central and South America, and parts of Africa.
The one that stayed in a particularly good memory for me is the one that I tried in Chiang Mai in northern Thailand. There, we were staying with amazing and kind hostess C., who would make sure that each of our days started with a fresh homemade breakfast. In most cases it was her delicious khao tom with banana filling. She would also let us use the kitchen in her back yard and teach us how to make perfect Thai-style sticky rice.
I’m sure I’ll remember those peaceful sunny mornings in her back yard and khao tom with morning coffee from a local roastery for a long time. To be quite honest, I will remember the first khao tom (actually some kind of sweet bánh chưng) in Vietnam for a long time as well – in the night time, for very few thousands of Vietnamese dong, after 35 (thirty-five) winding hours in a cramped old bus and ten hours at the border that we had to wait because the driver was caught smuggling tobacco from Laos – but the one from C.’s charming place in Chiang Mai will certainly stay in a much sweeter memory.





I’m not sure if this may be a mistake in the recipe, or if it was intentional and just a “different” flavor from a particular region. But I strongly feel that the directions to add “lemongrass” was a mistake and it should’ve meant “pandan leaves”. Because I made this and shared with a neighbor who is Thai. She took a bite and made a weird face…..and she was very sweet about it… but she certainly laughed at me a lot when she asked what the strange flavor was ….and I said “lemongrass”. She took me to her freezer and showed me a packet of pandan leaves and said that’s what I was supposed to use. I don’t regret making this recipe because I got a chance to learn the process, but I have to admit the lemongrass flavor was very strange and not very easy to eat. (My Thai neighbor said lemongrass is for savory dishes like curry, not desserts. I’m not sure if this is a universal rule or if it’s regional)
Hi, thank you so much for your comment. You are right, I should have written pandan leaves because that is the traditional way to make it. We actually used to make this lemongrass “twist” in Europe, since it was impossible to find pandan leaves and we liked the taste of lemongrass in sweets. It’s my mistake for not educating myself fully. I talked with my Thai friend and she said the same, they don’t traditionally use lemongrass in sweets. I will replace the lemongrass in the recipe with pandan, thank you for bringing this up!
Thank you so much for this recipe! I made it with a steamer and they turned out amazing. Definitely making them again.
Hi Jasmine, thank you for the comment! I’m so happy that you enjoyed it 🙂