
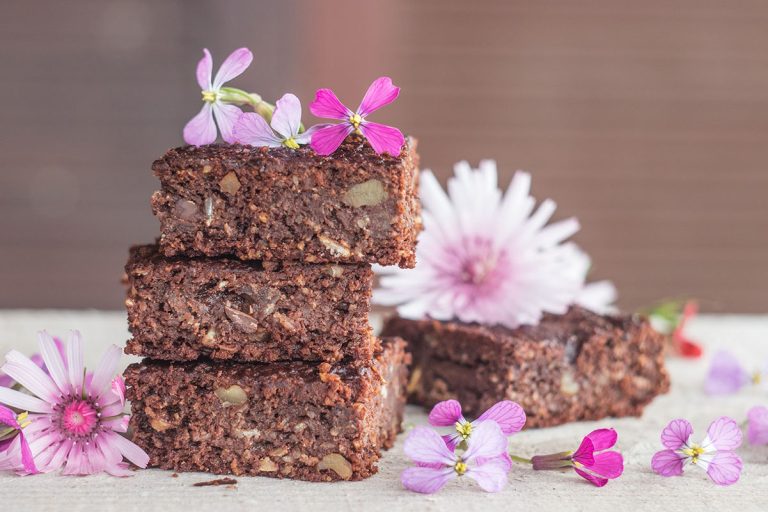
Delicious Vegan Katsu (Soya Cutlet) Recipe
With this recipe, you will make incredibly tasty vegan katsu steaks from soy “meat”. These soya cutlets are super juicy on the inside and crispy on the outside – while also being completely oil-free and gluten-free.
The ingredient list for the vegan katsu
I decided to put some effort into making delicious vegan cutlets that will taste amazing and won’t be unhealthy at all. So – a perfect katsu with no frying, no bread crumbs and no nasties in the ingredient list? Yes, please! And the ingredients are…
- dried textured soy protein slices (soya meat)
- sesame seeds
- whole-grain cornflakes*
- fine rice flour
- tapioca starch
- naturally fermented soy sauce
- Himalayan salt.
* check the recipe card below for more info on which cornflakes to choose.
Even though I would usually go for tofu in this kind of recipe, this time I decided to use textured soy protein slices (also called soya meat or soy steaks).
What is soya meat?
Soya slices (soya meat or textured soy protein) are made from defatted soy that is left over after pressing soy oil. They are a really cool option if you’d like to get a more meaty texture in a vegan dish and have it taste like, for example, chicken katsu.
They are full of protein and fibre and can be a delicious meat substitute to enjoy on occasion. I don’t prefer to eat soya meat slices regularly because they are a processed foodstuff after all, but from time to time – why not.

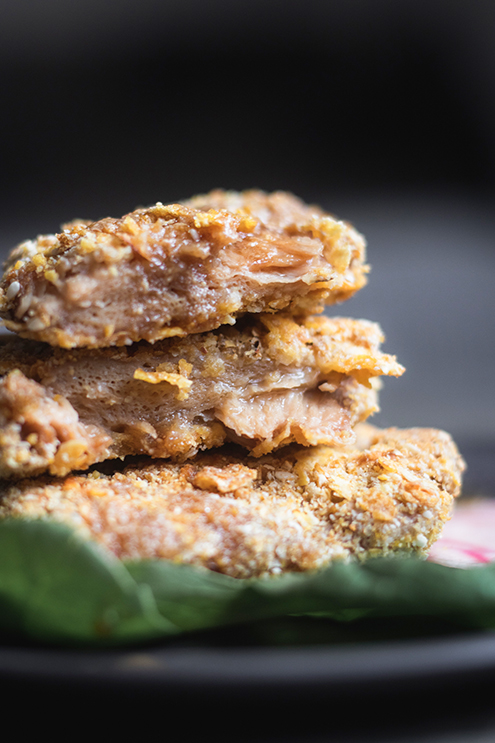
I got the impression that not many people know how to cook textured soy protein slices properly, which is another reason for writing this recipe. If you follow these steps, your katsu soy “meat” steaks will be really juicy on the inside, but also nice and crispy on the outside – just like real katsu.
Achieving the perfect katsu texture
There are a few little tricks for getting the juiciest soya meat, while also having all that crisp in the crust even without frying in oil. So, let’s start with preparing the “meat”.

How to make soya meat super tender and juicy
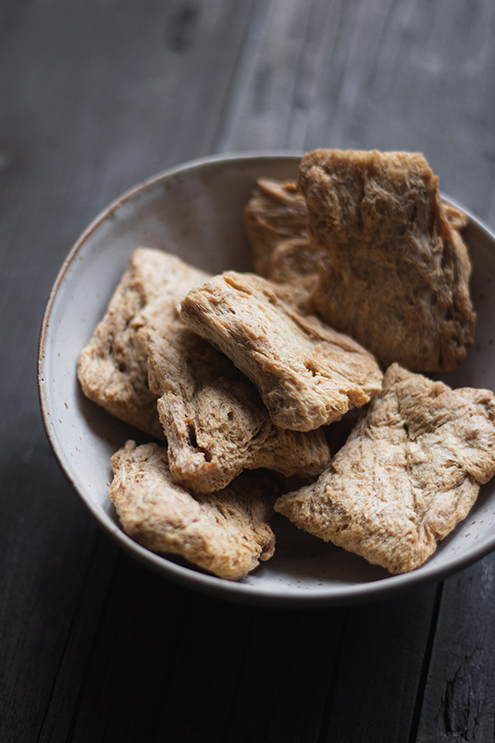
I used plain dried textured soy protein slices (soya meat steaks) that I had purchased from a local producer. These ones that I got were not very dense or compact, which is exactly what I was looking for – the final result will be juicier this way, as they will absorb more batter in further steps.
1. Cooking soya meat slices
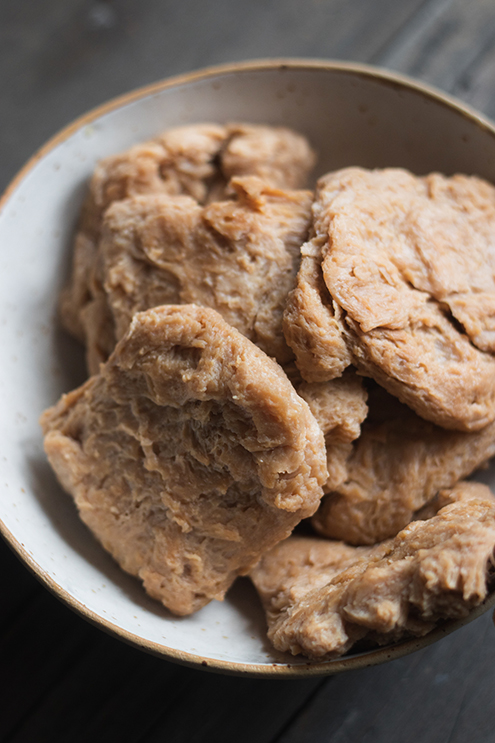
Dried soya meat needs to be cooked for long enough to get nice and soft (too short a cooking time will leave them chewy and not that appealing). Mine took about twenty minutes in a covered pot over low heat to get soft.
Cooking soya steaks in water with soy sauce and spices will add flavour to them, so I would really recommend it. This time I added only shoyu to the cooking water because I think it is the most important component for bringing flavour to otherwise pretty tasteless soya meat.

2. Removing the liquid
After cooking, I let the soya slices cool down and squeezed them to remove the liquid. They need to be somewhat dry to be able to absorb the liquid in the next step.
3. Preparing the batter
Now, I mixed a thin batter from fine rice flour, tapioca starch and water. You can use the water that is leftover from cooking soya chunks, as it is still salty and has some flavour from the shoyu. If you are using new water, you’ll need to add some shoyu to the batter as well.

4. Dipping the steaks in starchy batter
Now, it is time for dipping the cooked and dried soya chunks into the rice and tapioca batter. The batter will seem a bit thin, but keep in mind that both rice and tapioca starch will absorb a lot of liquid when heated in the baking.

This starchy batter is what gives the vegan katsu steaks a lot of their juiciness. It will get into the pores of soya meat (so make sure to get those steaks well soaked in it!) and after baking, it will look like there are bits of fat along the meaty texture of soya steaks. How cool is that?
After you have dipped/soaked soya meat in the starchy batter, you will need to cover them in the crumb mixture that will make the super crunchy crust.
Making the gluten-free “panko” crust
I decided to go completely bread-free in this recipe and improvise something that will look a bit like panko, but from completely different foodstuffs. I decided to use sesame seeds and whole-grain cornflakes.
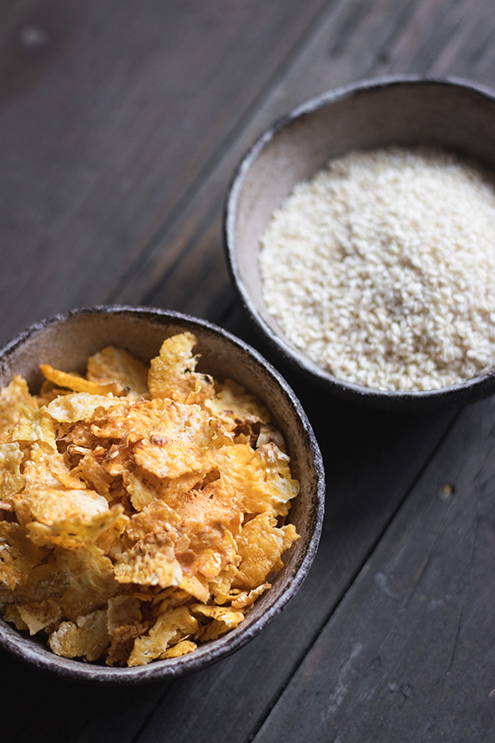
Sesame will give you the best result if you grind it in a coffee grinder. Corn flakes can also be ground that way (but not for too long, we still want some bigger chunks!), or crushed in a mortar or even with hands if you have the patience.

The steaks need to be covered in a mixture of ground sesame and cornflakes – I do this by simply putting a steak that is still wet on its surface into a wide bowl with sesame and corn crumbs, shaking it gently and turning it on the other side.
Baking the soya katsu
When all the steaks are crusted in sesame and cornflakes, they are ready for baking. I bake them in the oven at 200 °C for 25 minutes. I wouldn’t recommend a lower temperature, because the baking would take longer and the steaks would get dry.
This way they will stay juicy on the inside, and still get that crunchy golden crust we are looking for in a good katsu.

If you prefer to pan-fry these soy cutlets, or even deep fry them, it will work too! Or, if you have an air-frier, that would be a healthier option. I don’t have one, so I opted for the good old oven to make these katsu’s in an oil-free version.
I have to say they turned out insanely delicious!

Serving ideas
These vegan soya cutlets can be eaten in many combinations.
- I love to have them with a mixed vegetable salad on the side.
- Any lunch combinations that would usually include meat cutlets will be great.
- They will also be a tasty addition to Japanese-style curry and rice.
- With some homemade bread, veggies and dips, you can make a delicious katsu sandwich.
- Or, simply bake them on a stick and serve with some hot sauce.

Delicious Vegan Katsu (Soya Cutlet) Recipe
Super tasty vegan soya cutlet (katsu) that is really juicy on the inside and crispy on the outside. Gluten-free, oven-baked and made without oil.
Ingredients
- 100 g (3.5 oz) dried soya meat (textured soy protein slices) - in my case it was 8 small steaks
- 2 cups water
- 5-6 tbsp shoyu, or other naturally fermented soy sauce
- ⅓ cup tapioca starch
- ⅓ cup fine rice flour
- ⅔ cup water
- ⅓ cup sesame seeds
- 1 cup whole grain corn flakes
- 1 pinch Himalayan salt
Instructions
- Put two cups of water and 5-6 tablespoons of soy sauce into a pot, add the dry soy protein slices and bring to a boil.
- Cook the soy steaks in a closed pot over a low heat until they get soft and tender. They will always be a little bit chewy, but their texture should be pleasant, not gummy. Mine took 20 minutes to cook. You can add some more water if needed.
- In the meantime, you can prepare the gluten-free “panko” crust mixture. Grind the sesame seeds with a coffee grinder, and crush the corn flakes in a mortar to have some fine crumbs and some coarse ones. You can also use the grinder if that is easier for you.
- Mix the ground sesame, cornflakes and a pinch of salt in a bowl, and set aside.
- Once your soya steaks are cooked, let them cool down and squeeze them to remove the liquid. You don’t have to remove all the liquid, but the slices should be dry enough to absorb new liquid in one of the following steps.
- To prepare the starchy batter, you will need to mix tapioca starch, fine rice flour and water. I like to use the water that is leftover from cooking soya slices, since it still has the soy sauce flavour and saltiness in it. If you are using new water, add about two tablespoons of soy sauce in it.
- Dip the cooked and dried soy steaks in the batter. Make sure to cover them well, because this batter will help you get a super juicy texture.
- Now, you can cover the soy slices with sesame and corn crust mixture. Just put them in a wide bowl filled with the crust mixture, shake gently and turn around.
- Preheat the oven to 200 °C (390 F).
- Put the soy cutlets on a baking tray and bake for 25 minutes.
- Enjoy soya katsu with fresh vegetables and rice, or simply dip them in your favourite sauce.
Notes
Instead of water for cooking and making the batter, you can use vegetable broth to add more flavour to the soya cutlets.
When using the starchy batter, always make sure it is well-mixed. The starch will sink to the bottom really quickly, so you can stir it before dipping the soya slices in it.
If you need the recipe to be completely gluten-free, opt for a certified gluten-free cornflakes brand since most cornflakes contain barley malt extract (usually not a problem if you have a regular gluten sensitivity).
Also, if you are avoiding excess sugar in your diet, check the ingredient list on the cornflakes packaging because many cornflakes contain quite a lot of added sugar. I usually buy mine in healthy food stores where I always find sugar-free ones.


Love this recipe and will definitely try it. I imagine crispy, “meaty”, vegan katsu with some delicious korean bbq sauce.
I did have one comment: most cornflakes have malt as a flavouring which will not be gluten free. Nearly all malt is barley malt and barley contains gluten. I have celiac disease, and cannot have the “BROW” ingredients – barley, rye, oats and wheat. Now, oats do not have gluten per se. But most oats are processed in fields, sorters and equipment that are used for wheat processing, and oats have a protein that is so similar to gluten that a majority of people with celiac disease react to oats as though it were gluten. No biggie, I’m accustomed to swapping out ingredients and will definitely use gluten free panko!
I really appreciate your recipes and gentle writing.
Hi, thank you for the comment 🙂 I am glad that you like the recipe!
I didn’t mention the malt in the cornflakes in this post so as not to confuse people – usually people with gluten intolerance/sensitivity don’t have a problem with such small amounts of barley malt, and I know that people with celiac disease are extra careful with any ingredients so they would for sure double-check that they buy certified gluten-free cornflakes (that was my logic, but please let me know if I’m wrong). I actually saw a couple of certified gluten-free cornflakes brands in Croatia where I live! Don’t know how it is in other countries.
I think swapping the cornflakes with gluten-free panko is an excellent idea. I’m sure your katsu will turn out amazing!
An update…:) Your comment about cornflakes got me thinking and I did a bit of research. Since all of the cornflakes brands I use come from smaller, eco and healthier-oriented companies, I was accustomed to the amount of barley malt in the ingredients list being between 0 (not GF certified though) and 1.5 per cent, which is really low. After your comment, I started reading the more commercial cornflakes ingredients out of curiosity and turns out that some of them have only 90% corn and the rest is sugar and barley malt. Didn’t know it was that bad, honestly… I will add a note in the article or the recipe card regarding that (high sugar content + barley malt) because not sure how many people actually read the ingredients. Thank you for this comment, it was helpful and I learned something new!