How to roast chestnuts like a pro (easy to peel!)
This roasted chestnuts recipe is for all my chestnut-loving friends and family. I grew up in Croatia, where picking chestnuts in local forests and oven-roasting them at home is an autumn tradition in many families. As a kid, this was one of my favourite things in the world.
The only thing that frustrated me every year was that, even after careful cutting and roasting, some of the chestnuts were incredibly hard to peel. After trying all the hacks I could think of, this was the one that worked best for me.
If you’ve avoided making roasted chestnuts at home because they’re hard to shell, this recipe is for you. I’ll show you how to roast chestnuts in your oven in a super easy way. Keep reading to discover my simple tricks for perfectly cooked chestnuts that are delicious and easy to peel.
Easy Roasted Chestnuts Recipe
This is how I make oven-roasted chestnuts at home. They are super easy to peel and taste great.
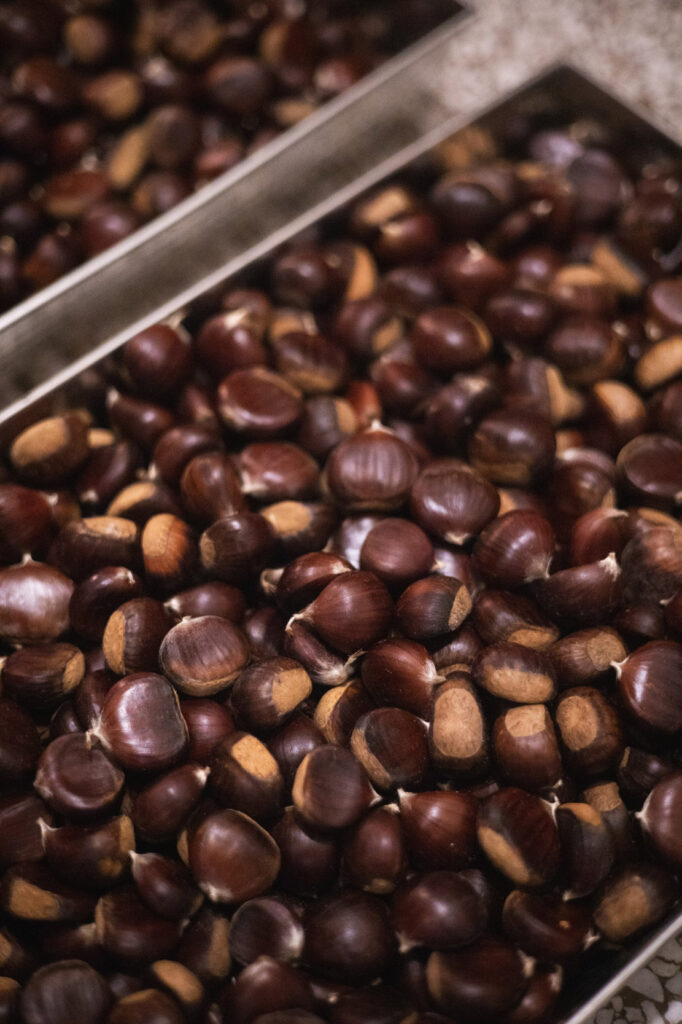
Choosing the Best Chestnuts
The secret to truly delicious roasted chestnuts starts with selecting the right ones. Choose the fresh, shiny chestnuts that look like they have freshly fallen from the tree.
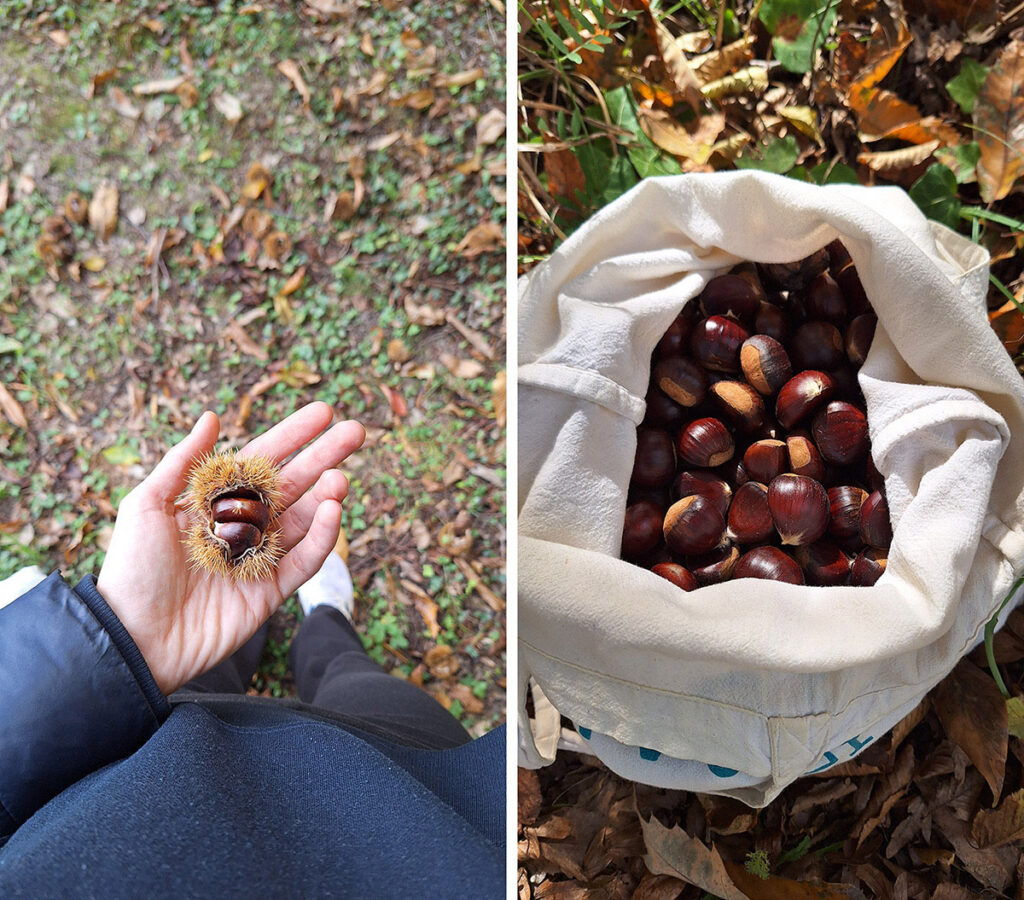
Don’t collect old, dull-looking ones, especially after rainy days, as they won’t taste that good and also won’t peel as easily. The fresher and healthier they look, the easier they will be to peel. You’ll also get their natural honey-like sweet flavour.
Making the cut
This is the first and crucial step to perfectly peelable roasted chestnuts. While I spent most of my life making a single line incision, I’ve discovered that cutting a cross (or “X”) shape on the shell makes a world of difference for easy peeling later.
Here’s how to do it:
Use a sharp, serrated knife to make a cross incision on the chubby, rounded side of the chestnut (not the flat side). The cut must be deep enough to slice through the thick, outer skin and the thinner inner skin just underneath.
Be careful not to cut all the way through the chestnut flesh; you only want to score the shell and the inner membrane. This small effort ensures the steam can escape and the shells will easily flake away once they’re roasted.
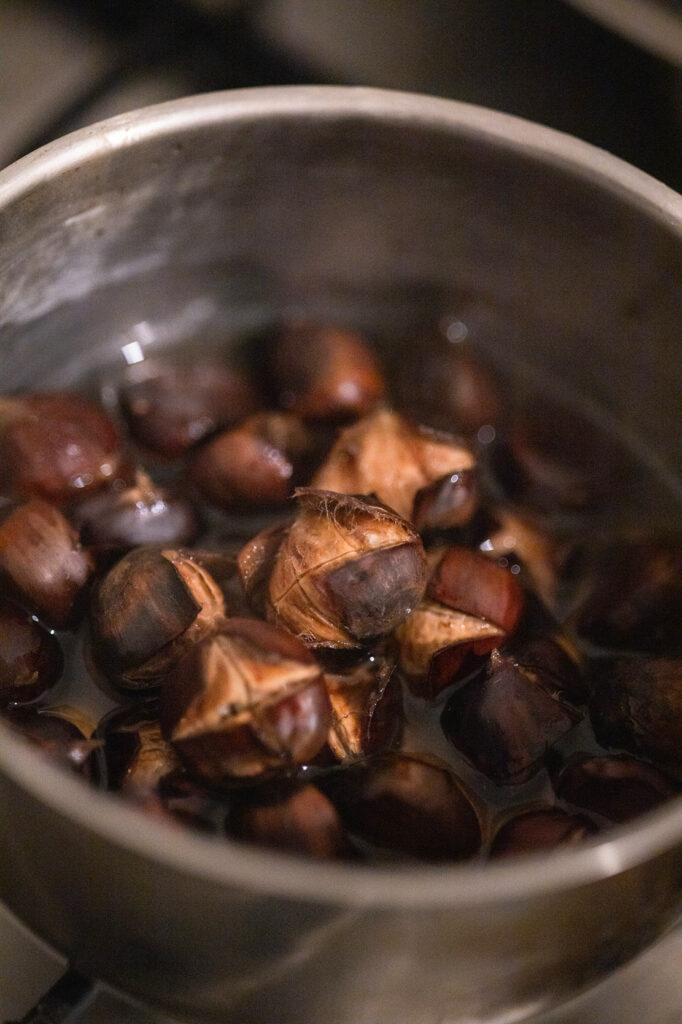
The Quick Boil
This boiling step is a great way to make the shells more tender and ensure those easy-to-peel results. With super fresh chestnuts, I sometimes even skip this. But the longer they spend in my pantry, the more important it gets to soften them with this quick boil before roasting.
- Place your cross-cut chestnuts into a large pot.
- Cover them with water, aiming for about two fingers’ depth of water above the chestnuts (I like to use warm tap water to speed things up).
- Bring the water to a rapid boil over high heat.
- Once boiling, reduce the heat to medium-low, cover the pot, and let them gently boil for 10 minutes.
- By the end of the boil, the cuts you made should have started to open up.
Instead of boiling, you can soak your chestnuts in room-temperature water for about an hour. I’ve tried both, and boiling has worked much better for me. It also softens the chestnuts, which makes them even more enjoyable after roasting (I love them with that slight crunch on the outside and super soft inside).
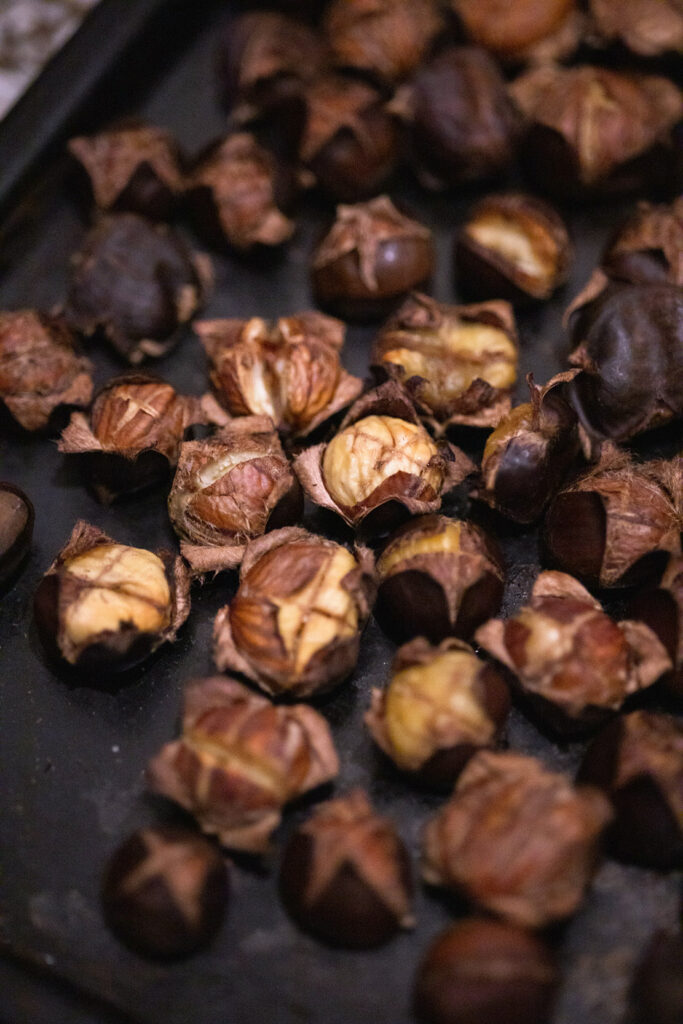
The Perfect Roast
We’re now going to dry-roast them quickly to crisp up the shells and make them crack perfectly.
- Quickly drain the boiled chestnuts and transfer them immediately onto a baking tray.
- Place the tray into an oven preheated to 190°C (375°F) with ventilation.
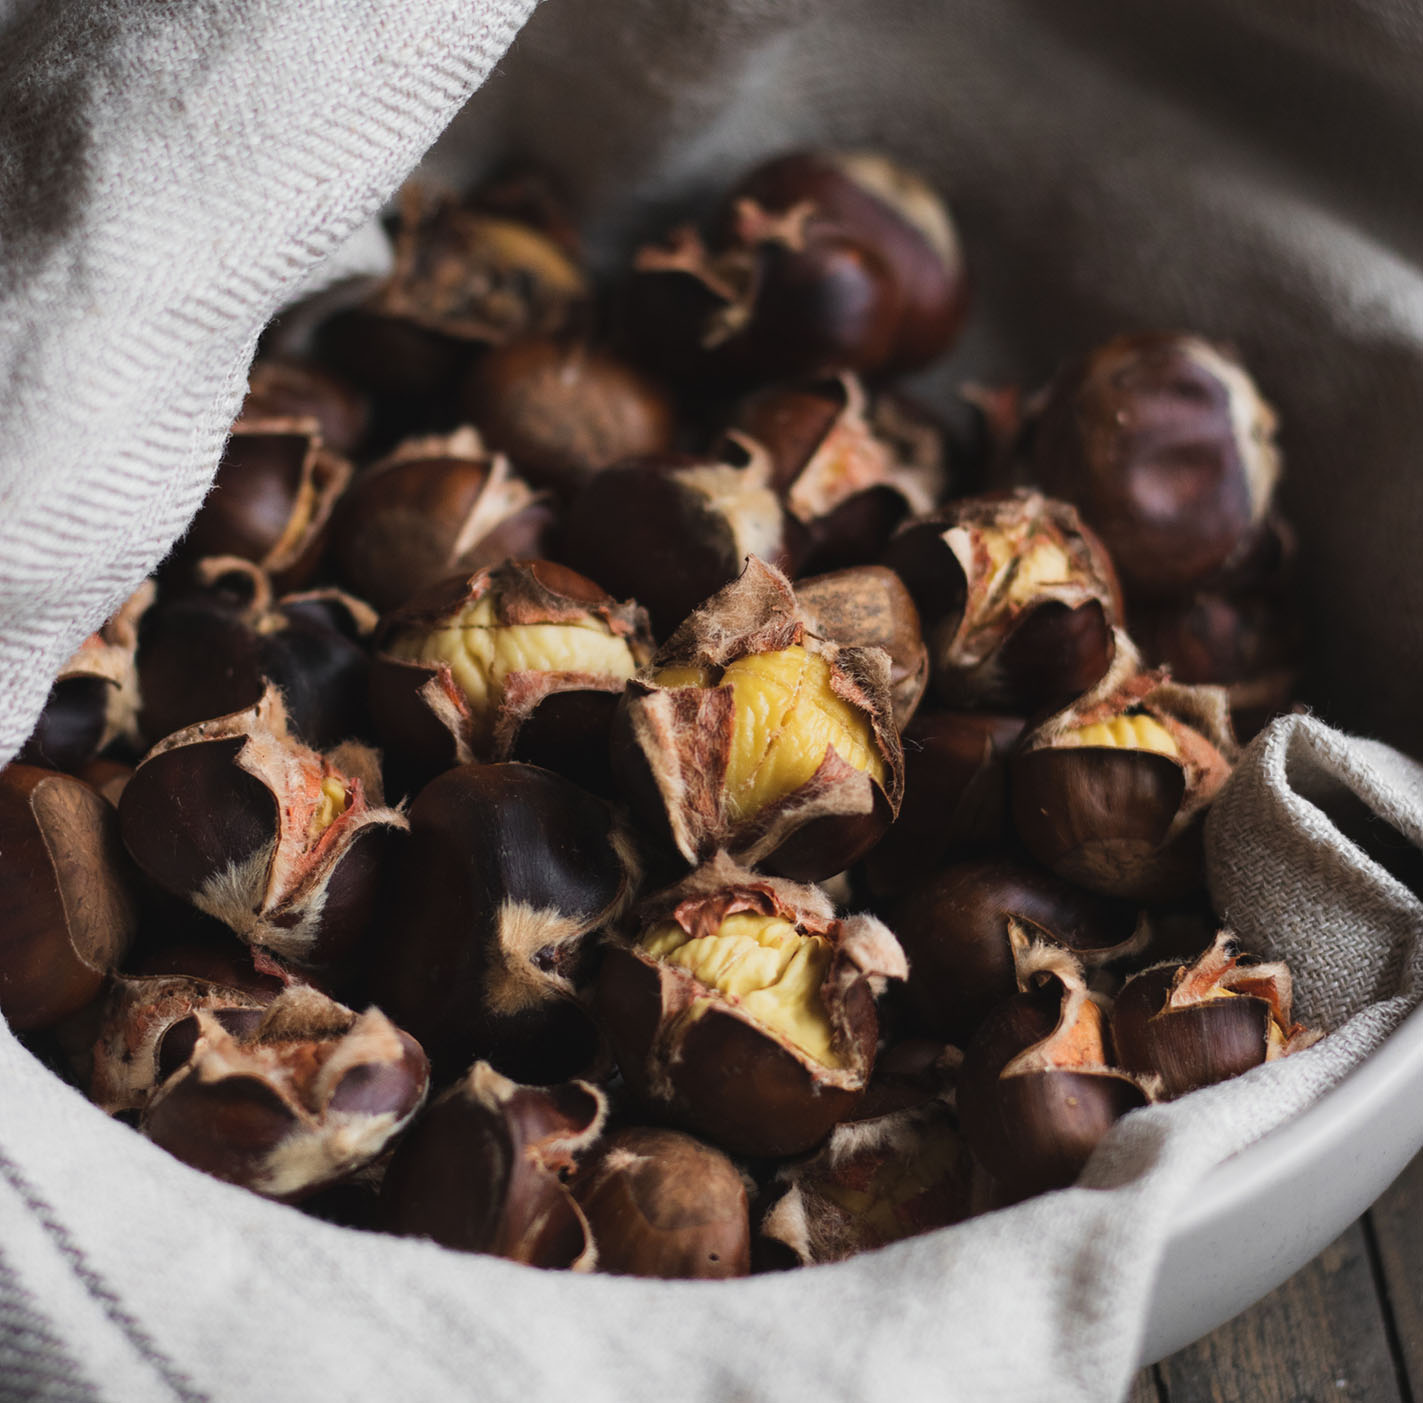
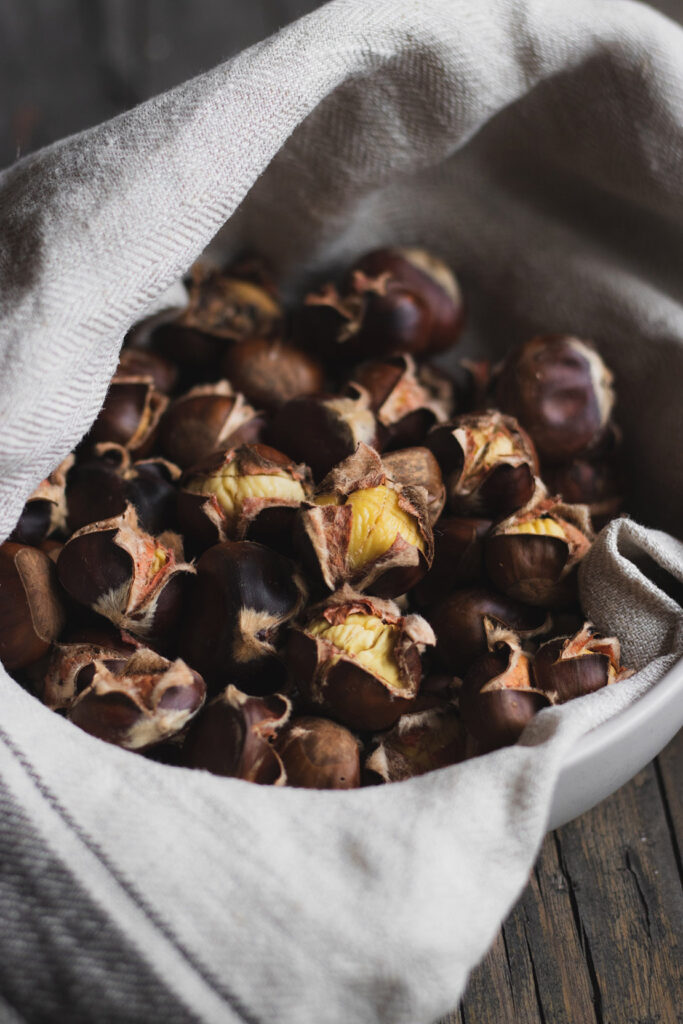
- Roast for about 15 minutes. Keep a close eye on them; the shells should be visibly split and curled open, exposing the light-colored flesh inside.
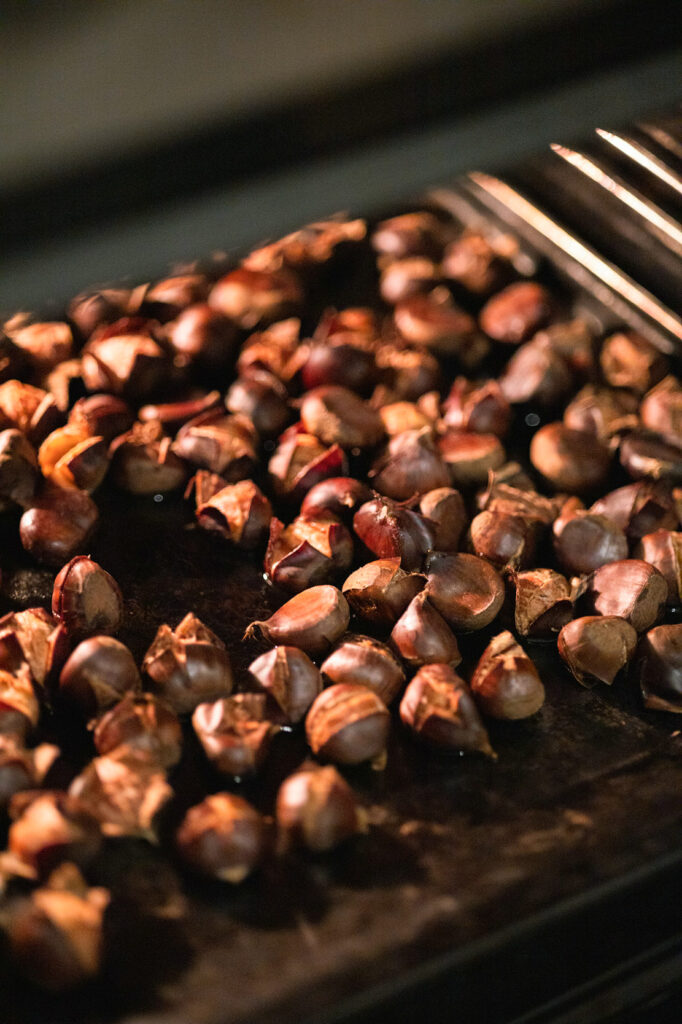
I’ve found that using the fan/convection setting makes the best roasted chestnuts. The quick, dry, circulating heat helps the kernels open and crack perfectly and makes them really easy to peel.
Each oven is different, but the temperature range between 180 and 200°C (350-390°F) worked best for me. The ventilation setting heats more, so keep that in mind, too. On a normal setting, I would go for a higher temperature, even 220°C (425°F), because shorter roasting at a higher temperature helps crack those skins and leaves the flesh soft on the inside.
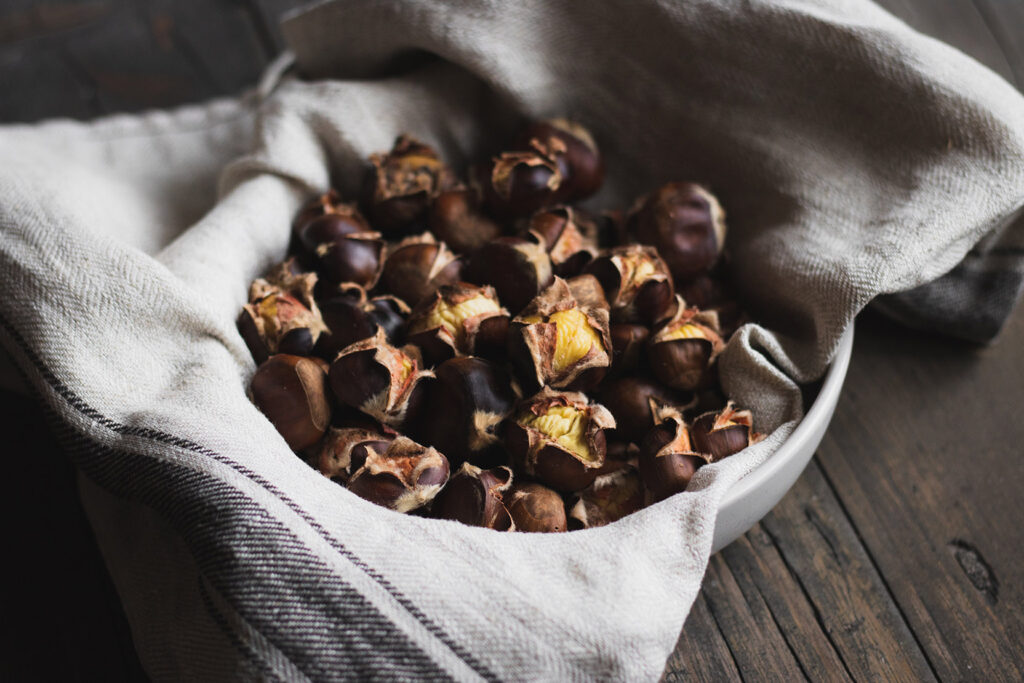
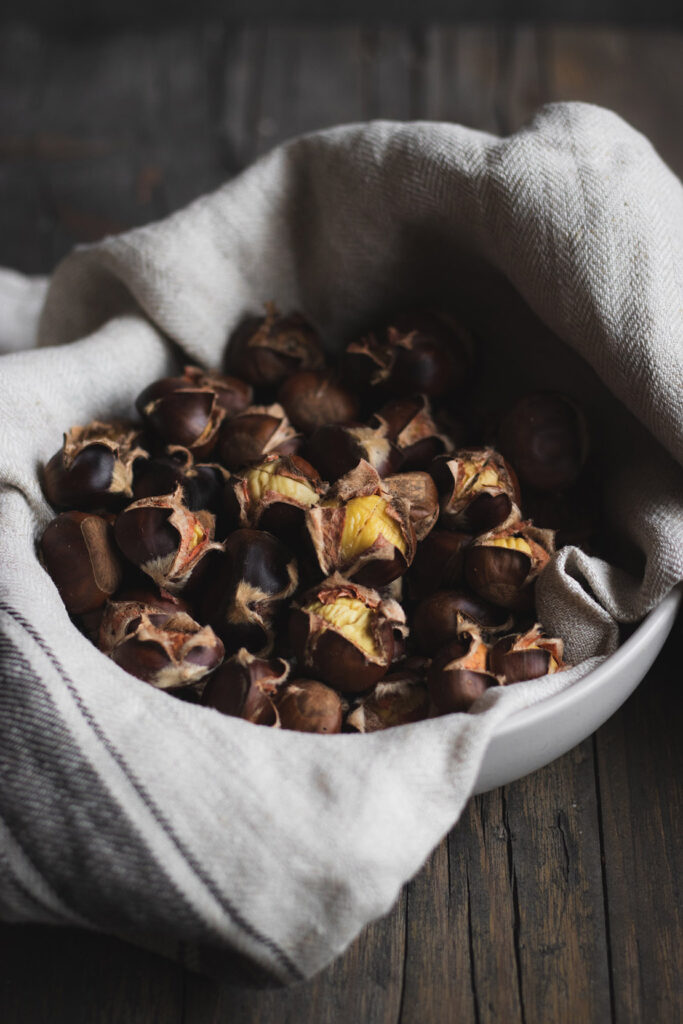
Steaming in a kitchen towel
Once the roasting time is up, there is one last step to help those shells slip right off:
Remove the hot chestnuts from the oven and wrap them snugly in a clean kitchen cloth or towel. Let them rest for about 10 minutes.
This resting period traps the residual heat, causing the chestnuts to steam slightly within the towel. This moisture makes the remaining shells and inner skin soft and pliable, meaning they will be easy to peel while they are still warm.
Peeling
The final step is the reward! While we’ve taken all the right steps, keep in mind that the ease of peeling can sometimes depend on the specific type of chestnut (even nuts from different trees in the same area can vary).
Generally, though, with this method, they should be quite easy to peel. Many of the shells and inner skins will simply flake or peel right off. Sometimes, you may need to press them gently with your fingers to help crack and separate the skin from the flesh.
In some rare cases, if the chestnuts weren’t perfectly fresh or you have a particularly stubborn batch, you might need a small assist. I like to use a small, straight, sharp knife. Just gently insert the thin blade right under the inner skin, and usually, this is enough to get the tough membrane started so it peels off.
BTW, a little tip…
I generally recommend making a small test batch with all these steps to be sure your big batch will turn out great. I do this every year, just in case, because I want them to turn out perfect after spending so much time cutting them. If needed, adjust the boiling or soaking time, oven temperature and roasting time to get the result you’ll love.
Enjoying Day-Old Chestnuts
Most of us have experienced how difficult ordinary roasted chestnuts are to peel (and eat!) the day after they were cooked.
However, using this method—with the boiling and the towel-steaming rest—I’ve found that any leftovers are actually quite easy to manage on day two!
Assuming you don’t eat them all immediately, here is how to handle the rest:
Simply leave the uneaten chestnuts in the same cloth you used for the resting step. They stay nicely moist and tasty overnight, and importantly, they still peel quite easily the next day.
This makes them perfect for prepping ahead. I often make a large batch and peel the leftovers the following day, specifically to use in sweet chestnut purée or other recipes.
Storing oven-roasted chestnuts
Refrigeration
Peeled chestnuts can be stored in an airtight container in the refrigerator. They will remain fresh and tasty for about 3 to 4 days (maybe even longer, but I haven’t tested it yet).
Freezing
For longer storage, place the peeled, cooled chestnuts into freezer-safe bags (like ziplock bags) and remove as much air as possible before sealing. They will store well in the freezer for up to 3 months.
To Use: You can add them straight from the freezer to hot recipes (like soups or stews), or defrost them overnight in the fridge for use in cold preparations (like chestnut purée or cakes).
Recipes with roasted chestnuts
How to use roasted chestnuts? Here are a few ideas:
- Make this delicious, hearty soup with mushrooms and chestnuts.
- Add them to this tasty autumn breakfast bowl.
- Add some water or plant-based milk and turn them into a delicious chestnut purée.
- Make these insane chestnut brownies, still to this day one of my favourite sweets and they’re super easy to make!
Oven-Roasted Chestnuts (Easy To Peel!)

Follow this simple method to achieve easy-to-peel roasted chestnuts right in your own kitchen. These are the essential tricks for making delicious oven-roasted chestnuts at home.
Ingredients
- Chestnuts
- Water
Instructions
- Choose fresh, firm, shiny chestnuts (avoid dull/old ones).
- Using a sharp knife, make a deep cross (X) incision on the rounded side of each chestnut, cutting through both layers of skin but not through the flesh.
- Place cut chestnuts in a large pot and cover with water (about two fingers above the chestnuts).
- Bring to a high boil, then reduce the heat to medium-low.
- Cover the pot and boil for 10 minutes. The cuts should start to open.
- Preheat oven to 190°C (375°F), using the fan/convection setting. If you don’t have that setting, you can set the temperature higher, 200-220°C.
- Quickly strain the chestnuts and transfer them to a baking tray.
- Roast for 15 minutes.
- Immediately remove the hot chestnuts and wrap them in a clean kitchen towel.
- Let them rest and steam for 10 minutes. This makes peeling much easier.
- Peel and enjoy while warm!
Notes
Instead of boiling, you can soak your chestnuts in room-temperature water for about an hour. However, I’ve found boiling to work best, especially with these small, hard-to-peel chestnuts that we have in Northern Croatia.
If you got your hands on some chestnut variety that is especially easy to peel, lucky you! You might want to skip the whole boiling or soaking part.
Remember that every oven is different, so the 15-minute timing is a guideline. It might take a little longer for your chestnuts to achieve that perfect, cracked appearance.
Generally, the longer you roast them, the easier they will be to peel (because the heat dries out the inner membrane). However, be careful not to leave them in the oven for too long, as they can quickly become dry and too hard to bite.
I personally prefer to take mine out just before the flesh turns golden, resulting in a softer, tender bite. But if you like a deeper, nuttier flavour, you can certainly leave them in for a few extra minutes!
If you want to be extra sure they’ll turn out great, you can make a small test batch first, with all the steps, and adjust the method (cooking time, roasting time and temperatures) to achieve your perfect result.
Leave unpeeled leftovers in the same cloth; they will stay moist enough and peel fairly easily the next day for snacking or making purée.
If some of the chestnuts come out harder to peel, use a small, pointy, sharp knife to remove those inner skins.
You can store the peeled chestnuts in the fridge for about 4 days, or freeze them for up to 3 months.